Showing posts with label diy. Show all posts

Saturday, August 3, 2013

Dave Ramsey money envelopes

Once I saw these Dave Ramsey money envelopes I just knew I had to make a pile for myself.  Before we were just using regular paper envelopes and every other second I was switching one out because they were getting all haggard.  And since your on a budget these can be made entirely from scraps. 


 1. Cut two squares (matching or not!) 7 3/4'' by 7 3/4''

2. Apply medium weight interfacing to one of the squares. I save my scraps just for this.


 3. Sew the squares, right sides together, leaving a hole to turn it right side out.  Clip the corners.


4. Turn and sew along two opposite sides of your square. 

5. Fold the square in half, bringing the seams together. I like the piece with the interfacing on the outside, but I have made them with the interfacing on the inside fabric and it doesn't make much of a difference.

6. Sew the other opposite edges.

7. Stuff with money.  I also put in a index card where I write what the envelope is for and how much goes in each month.

8. Go forth and multiply.


If you liked this post then please consider subscribing to my blog for more posts you will love, or leave a comment! 


Friday, July 26, 2013

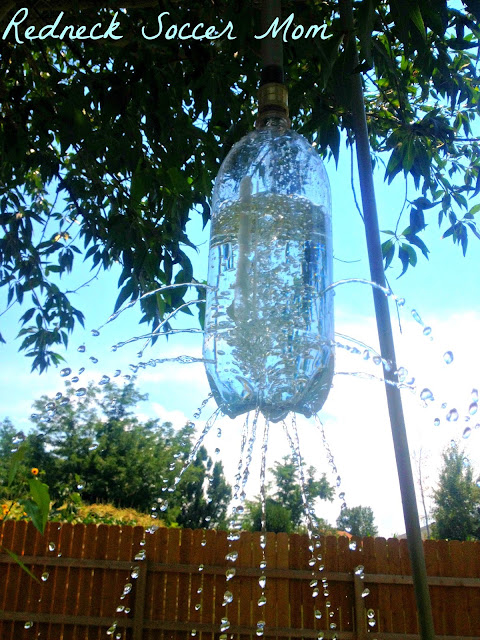
Trash to fabulous - empty soda bottle to back yard splash park

This post has moved please CLICK HERE to continue.


If you liked this post then please consider subscribing to my blog for more posts you will love, or leave a comment! 

Tuesday, February 26, 2013

Homemade play kitchen

I have seen these all over pinterest and we decided to make one for the girls for Christmas. I picked up this old entertainment center for just $30. We took out the glass and sanded it down just slightly because it was laminate. I used this how to paint laminate tutorial.  This was by far the best painting laminate experience I have ever had. 


My husband cut a hole in it for the sink. 


Then I painted it with a light layer of killz.  When the killz was dried I painted it with some white paint I found in the garage.


I taped off a section for the stove top and painted it grey.  When the gray was dry I traced two circles and free hand painted it black for the burners. 


We got this bowl and the phone at a second hand store.  My husband glued the bowl in and the phone base down.  Cheyenne calls it her 'iphone'.  Then we added the faucet.  Since it is a real faucet we had to cut three small holes to put it in.  We just glued it down.  Then my husband (starting to see the trend? I paint he does the other stuff) cut two pieces of wood, one for the oven and one for the fridge.  I painted the oven one with a black rectangle on it, just like a real stove.


Cost:
Entertainment center at a garage sale: $30
Bowl at second hand store: $1.50
Phone at second hand store: $3
Paint and paint supplies: free(found it in the garage)
Faucet: $19(couldn't find one at a garage sale or second hand store for the life of me!)
Cupboard/fridge/oven handles: $9
Hinges: $8
Wood for fridge and oven: free(found it in the garage)

Total: $78.50
Although I'm sure you could make one for cheaper if you looked for all the stuff you needed during garage sale season. 

The girls love this and the cook on it all the time.  I think it will last them longer than a store bought kitchen because it is bigger but we will see!


Saturday, October 20, 2012

Non-binding binding

I highly dislike traditional binding.  I don't like doing it.  Truth be told, I suck at it.  I know, I know practice makes perfect.  After working hard on a quilt the last thing I want to do it finish it with a haggard looking binding.  Most of the time I do a wrap around binding because I'm good at that one. 

I seen this impressive non-binding on pinterest.  I planned to do this on a camping quilt I'm making for my daughter's upcoming birthday.  I made the top and proceeded to sand which the three layers and I quilted it up.  It was then that I decided it would be a good idea to look at that tutorial and see how to do this non-binding binding.  Crap! I've done it wrong and I haven't even started yet. 

See I assumed it was going to be done way I had pictured in my head but I was wrong wrong wrong.  That's what I get for assuming.

I decided I would try the non-binding the way I assumed it was going to be done and hope for the best.  I already had my three layers quilted and I had cut the binding down to match the edges of the quilt(see what I mean about my assuming). So I folded the backing in about 1/4 inch over the batting. Then I folded the top under as well.  It took about an hour to get all the way around my quilt.  It was painstaking to get it perfectly even and I had to pin it a ton. 

I hate pinning.  If I think there is a chance I can sew something without pinning it then I will every time.  This project was not the time for skimping on pins.


Here I am stitching it on the inside of the presser foot.


Here is the finished edge.
All done!


Here it is all finished!  Camping in style here we come!

Related Posts Plugin for WordPress, Blogger...